How To Start a Compost Tumbler (Perfect Compost in No Time)
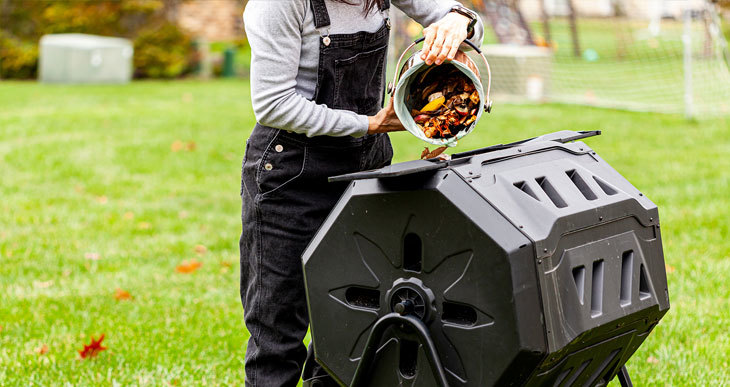
Do you want to start using a compost tumbler but don’t know how?
Composting is a great way to reduce your waste and help the planet. Not to mention, it’s really easy with a compost tumbler!
A tumbler makes it simple to create nutrient-rich compost for your garden in no time. Not only will this improve the health of your plants, but it will also help reduce your reliance on chemical fertilizers.
Suppose you’ve made a choice to go for a tumbler, or you’re seriously thinking about investing in one. In that case, this guide will tell you absolutely everything you need to know about getting started!
All the basics are right here!
Compost Tumbler Basics
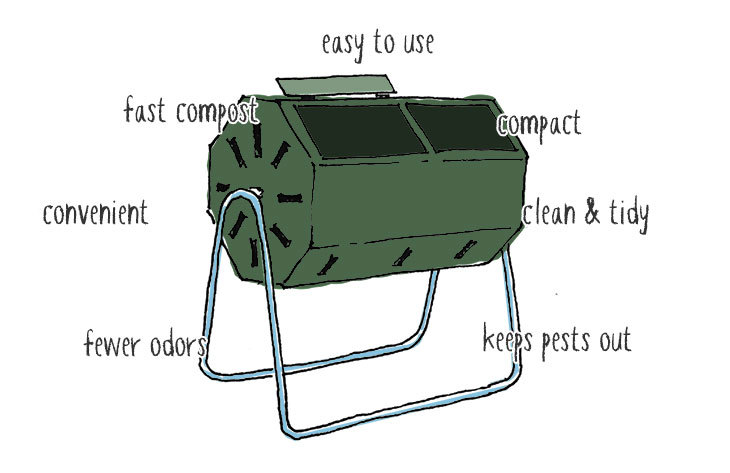
Compost tumblers are available in various shapes and sizes, but they all work on the same principle. Tumblers are basically bins suspended off the ground to make them easy to spin and add air to the compost mixture.
If properly maintained and set up, tumblers will make finished compost fast.
And compost tumblers have one significant advantage.
They are easy to “tumble”!
In other words … they are easy to turn, even when full. This means you’ll add air more regularly than other traditional methods. Consequently, this helps activate the beneficial microbes responsible for decomposition.
Things will heat up quickly. And some gardeners suggest you’ll get finished compost in just a few weeks!
The main benefits that set tumblers apart from other methods of home composting include:
- Ease of use
- Convenience
- Fast to produce compost
- Compact
- Clean and tidy
- Fewer odors
- Keeps pests out
So tumblers are a very handy solution for people looking for ease of use and quick results.
But you still need to manage and monitor the composting process for these systems to work.
To do this, you need to better understand compost tumblers compared to other methods and how to use them effectively.
A More Detailed Look at Compost Tumblers
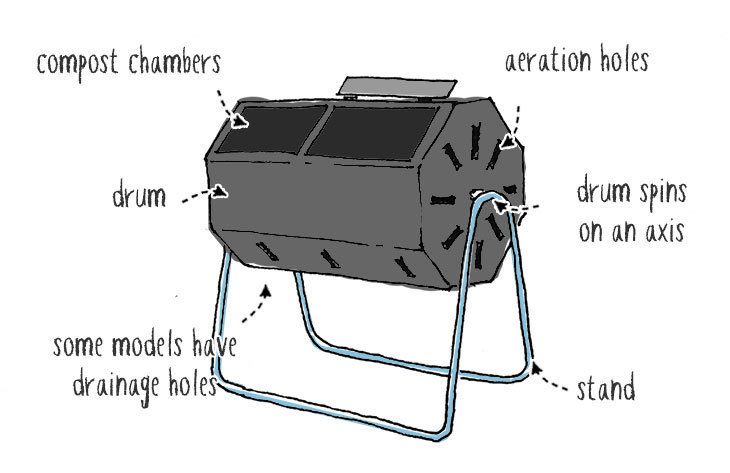
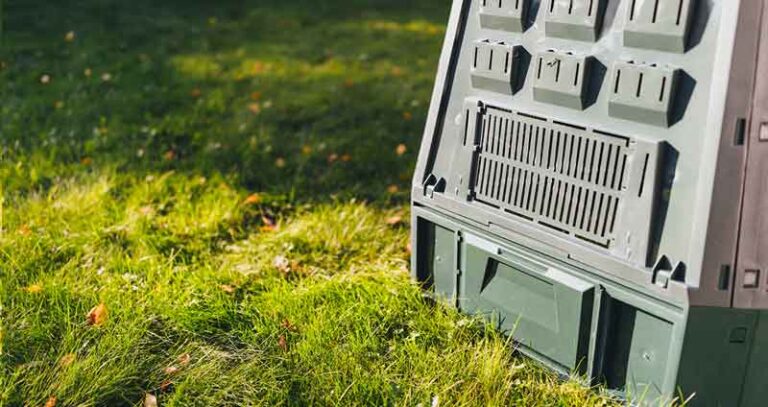
A tumbler is a closed compost container that is designed for easy turning. They have ventilation holes to encourage airflow. These self-contained systems are easy to place in a convenient location for composting organic kitchen and yard waste.
“Turning” is a well-known technique for introducing air and blending compost ingredients. This helps accelerate the speed of decomposition. But a conventional compost pile needs to be turned by hand with a pitchfork or some other manual tool.
Tumblers make the job of “turning” so much easier!
The tumbler drum sits on a stand and has a lid for adding waste materials at a convenient height. Rotating the drum mixes up the ingredients while the air holes let oxygen into the mixture.
Also, the closed container helps retain heat and moisture compared to a traditional open pile. By adding the proper ratio of materials, mixing and aerating them, and controlling moisture levels, a tumbler creates an ideal environment for the composting microorganisms to do their job.
Read “what is a compost tumbler” for a more in-depth description of this type of composting system.
So compost tumblers are suitable for gardeners new to composting who want to start producing their own chemical-free, nutrient-rich compost.
” Many experienced gardeners use compost tumblers in combination with other composting methods. Mixing methods like this means you’ll probably have finished compost more often during the year.”
But there’s something you need to keep in mind…
Despite their reputation for making finished compost in a short amount of time, this doesn’t happen by magic.
You still need to understand how these devices work to get the best results.
This means you’ll need to keep an eye on a few specific things:
- Balancing the ingredients (greens and browns)
- Monitoring moisture levels
- Make sure there are enough beneficial microbes
How Does A Compost Tumbler Make Compost?
A compost tumbler works by providing a closed system that retains heat and moisture. The spinning action mixes the organic waste inside and provides much-needed oxygen.
Good composting requires four essential elements to work well.
- Nitrogen-rich “green” materials
- Carbon-rich “brown” materials
- Oxygen
- Water
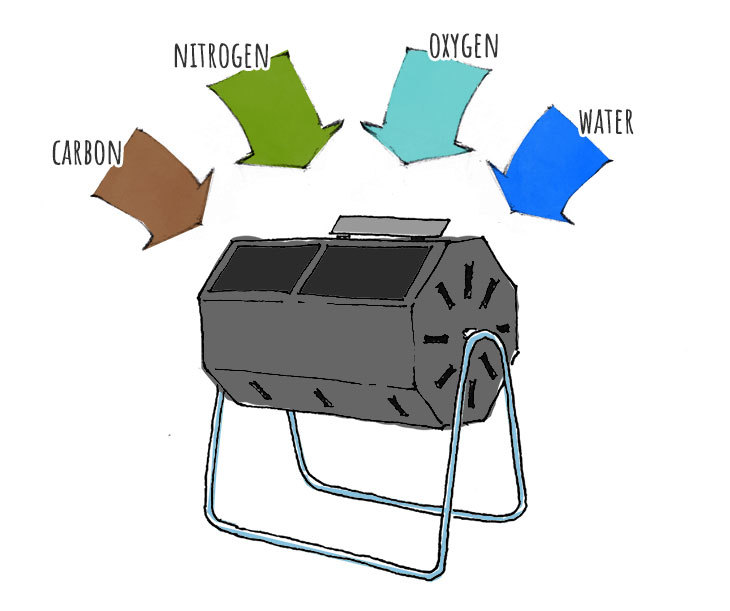
It isn’t just a case of throwing everything inside and giving it a spin.
If these elements are correctly balanced inside the tumbler, the microbial activity needed for decomposition is enhanced. Conversely, the composting process will slow down if things get out of balance.
This might sound daunting, but it’s actually pretty simple when you understand what to do.
How To Start A Compost Tumbler
To get started using a tumbler, you need to choose the best model to fit your needs, get it set up correctly in the right location, then feed it with organic materials. Next, you’ll need to follow a few simple steps to monitor, maintain and finally use your finished compost!
This step by step process looks something like this:
Table Of Contents
- How do I Choose A Compost Tumbler
- Where Is The Best Location To Put A Compost Tumbler
- Compost Tumbler Ingredients
- Compost Tumbler Ratio (Greens vs. Browns)
- How To Maintain A Compost Tumbler (Moisture)
- How Often To Turn A Compost Tumbler
- When to stop adding to a compost tumbler
- How To Empty A Compost Tumbler
1. How do I Choose A Compost Tumbler
Your first step is to decide what kind of tumbler you need. There’s a vast choice available on the market, but they can be separated by a couple of essential characteristics.
- The size and capacity of the chamber
- Single or dual-chamber tumblers
We all have different lifestyles, and each persons composting needs will vary accordingly. But as a general rule, the things you should consider are the size and whether you need two compost chambers.
Size is essential because larger composters tend to work better than smaller versions. This is because small models have a relatively large surface area compared to the volume, making it difficult to retain heat. This is why big compost piles tend to break down more quickly.
However, the space available in your yard might be a limiting factor. And you should also consider how much waste you and your family produce.
” Keep in mind 33% of household waste is food and yard trimmings. If you include cardboard and paper, on average, 56% of home waste is compostable material! “
Next, you have single or dual batch tumblers.
Tumblers tend to work best using batch composting. In other words, when one chamber is full, you need to leave that batch to mature before you can use it. A second chamber allows you to continue adding waste while the first batch cures.
Like this, you get a constant cycle, with one batch decomposing while the other is being filled.
My advice is to go for the largest capacity possible for your available space. And prefer a big dual-batch tumbler over single-chamber models. Look for a well-made unit that will last a long time. The simpler the rotating method, the fewer moving parts that can go wrong. The Miracle-Gro dual tumbler is an excellent example (Amazon).
2. Where Is The Best Location To Put A Compost Tumbler
A compost tumbler does not attract many pests. In addition, it does not produce offensive odors so long as you stick to the right ingredients. This makes it easy to locate the composter anywhere in your garden.
Think about how do you want to use your tumbler?
For example, it can be close your kitchen door to allow for easy depositing of kitchen scraps.
Alternatively, you might want to compost waste from your garden beds. In which case put it nearby to the place you work so you don’t have far to travel.
Some compost tumblers are designed to be portable, so you can vary the tumbler’s location. This is great if you compost a variety of organic material, and it takes the strain out of transporting compost to where you need it. The Mantis back porch composter is an excellent example. (Amazon).
3. Compost Tumbler Ingredients
So what are the things to put in a tumbler to get it started?
In general, compost needs two types of ingredients:
- Brown matter: this is dry garden waste like dead leaves or shredded branches. You can also add shredded paper.
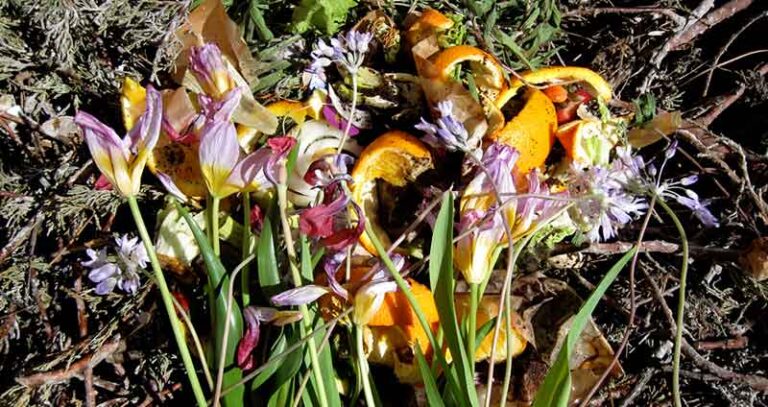
- Green materials: These can be things like grass clippings or kitchen scraps. They tend to be moist.
Tumblers are suspended off the ground. They are great at composting, but they don’t benefit from microorganisms and macro-organisms migrating into your compost from the soil.
A classic compost bin is in direct contact with the earth. Microbes and earthworms will be attracted to the feast of raw materials to help break down the waste materials.
But this isn’t possible in a tumbler.
To remedy this and help get the decomposition started, you can add a few handfuls of good living soil or add beneficial microorganisms using a commercial compost starter.
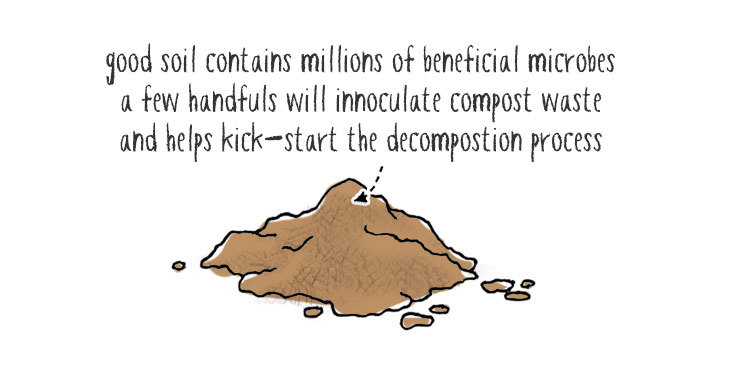
Another handy trick is to add a small amount of finished compost from a previous batch. Coffee grounds are rich in nitrogen and also make a good accelerator.
I have a comprehensive article called “What To Put In A Compost Tumbler,” explaining what you should and shouldn’t include in your composter.
4. Compost Tumbler Ratio (Greens vs. Browns)
Most people’s biggest mistake is adding too many wet kitchen scraps (green waste) and not enough dry carbon matter (brown materials).
Too many food scraps will turn compost into a slimy wet mess if not balanced with enough dry “brown” material.
Moisture can build up quickly in a tumbler because it cannot drain into the soil like a traditional compost pile.
This is why you’ll need to monitor moisture levels carefully in a tumbler. If you can squeeze out a lot of moisture when you pick up a handful of compost, then it is too wet.
If you generally add a lot of food waste, try to balance this with dryer things like dead leaves or shredded cardboard.
” There are various opinions about the correct ratio of green to brown ingredients.
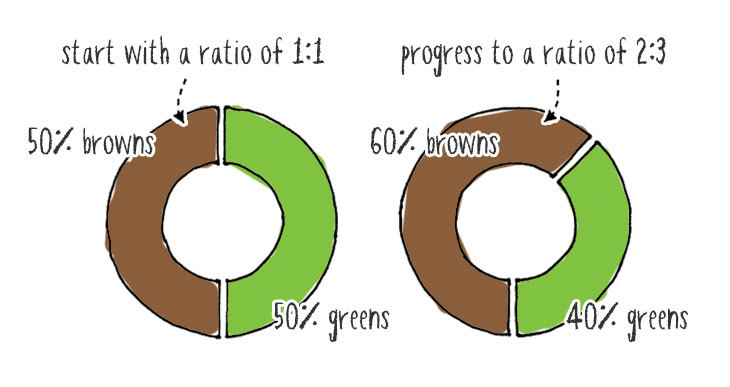
Starting with a 1:1 mix is a good option. The higher amount of nitrogen-rich components will help get the process off to a quick start.
Afterward, you can move towards a ratio of 2:3 – that is, two parts green to 3 parts brown (or if you prefer 40% green to 60% brown). “
Balancing greens and browns is a skill you’ll pick up in no time.
Green material is essentially nitrogen-rich waste materials, like vegetable and fruit peelings and off-cuts from your kitchen, grass clippings, coffee grounds, and livestock manure from herbivores.
Brown ingredients are carbon-rich components and consist of things like cardboard egg cartons, fallen leaves, and wood chips.
5. How To Maintain A Compost Tumbler (Moisture)
So what do you need to do to maintain the system and keep it healthy?
Looking after your compost couldn’t be easier.
After adding a balance of greens and browns, the main thing to monitor is the moisture content.
Compost should be not too moist and not too dry.
” The ideal moisture level in compost is between 40 and 60%. If you find this tricky to gauge, you can always use a compost moisture meter like this(Amazon). “
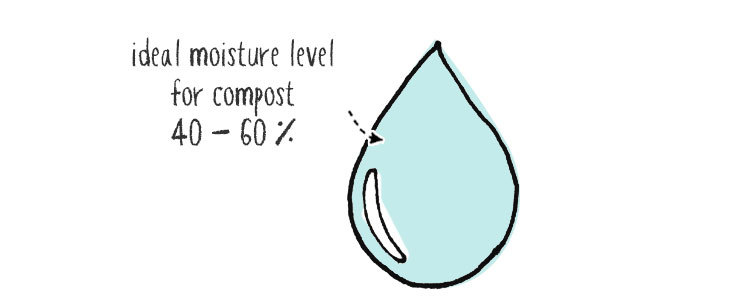
If your compost feels dry, adjust by adding a little water. If it’s too wet, you can rectify this by adding carbon materials like shredded paper then turning the compost to introduce air.
6. How Often To Turn A Compost Tumbler
Turning a compost tumbler is super easy, but don’t overdo it either!
Too much turning will dry out the contents and dissipate the heat at the center of the compost materials.
The best habit is to turn the tumbler each time you add fresh waste materials. Then, spin the drum two or three times each time you fill it. This helps break up the compost material and distribute the feedstocks evenly in the unit.
Afterward, you only need to turn the tumbler every 2 to 3 days at first, then less and less when the compost starts to reach maturation.
7. When to stop adding to a compost tumbler
Fill the composter to 80% of its capacity (leave a 3 – 4 inch air gap). After that, you should not add any new material to the chamber and allow the composting process to go through the curing stage.
You should also stop adding new materials about 3 – 4 weeks before harvesting.
8. How To Empty A Compost Tumbler
Finally, it’s time to harvest some compost!
You could have fully decomposed compost in 4 to 8 weeks, depending on how well things have gone! Which is pretty darn good compared to other systems.
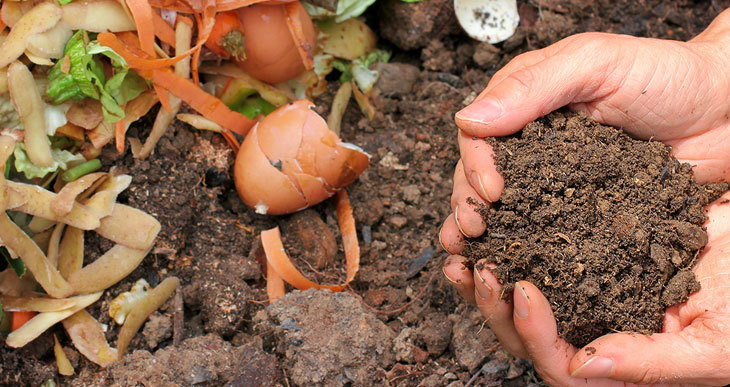
You will know your homemade compost is finished when it looks like, well, compost. The original ingredients will not be distinguishable in the mixture, and it should have a pleasant earthy smell.
Emptying the tumbler will depend on the type of model you have. Some are elevated off the ground to facilitate a wheelbarrow or similar container under the unit. Open the door and rotate the tumbler, so the compost falls out and into the waiting container.
Other tumblers are designed to be removed from their stand and rolled to where you need to deposit the compost.
Are Compost Tumblers Any Good?
Compost tumblers are an excellent choice for people new to composting to understand the process and produce compost faster than most traditional methods.
(learn how long it takes to make compost in a tumbler here…)
If you want a composter that is easy to use, neat and compact, prevents pests, has fewer odors, and makes fast compost, then a tumbler is a perfect choice.
A significant amount of household waste and leftovers can be composted. A tumbler helps you make composting part of your routine, keep food waste out of landfills, and reduce greenhouse gases.
The main downside to compost tumblers is that they are not suitable for oversized items such as large branches.
But hey… You can always build up your composting empire with other types of composting methods.
Tumbler FAQ
Got questions about compost tumblers? Here are the answers to a few more common questions:
Are Compost Tumblers Expensive?
Compost tumblers are generally more expensive than compost bins and significantly more expensive than a compost pile, which is practically free.
However, their popularity has grown, and prices have become much more competitive.
Compost tumblers will vary in price depending on the material used and the build quality.
What Kind Of Compost Tumbler Do I Need?
The best compost tumbler is the one that will fit the space you have available and meet your composting requirements and your budget. Even a small tumbler makes a significant contribution to reducing waste. And it could save you money in the long run.
Should I Get a Compost Tumbler or Bin?
Compost tumblers can produce fast results, but they need a little more maintenance and have a limited volume compared to bins.
On the other hand, compost bins require little work, but they are slower and likely to attract more pests.
Read my guide “Compost Tumbler vs. Bins” to get a complete overview of these two methods.
Should Compost Tumbler Be In Sun Or Shade?
Heat is helpful in the decomposition process.
But a tumbler doesn’t necessarily need direct sunlight. It’s ok if the tumbler receives morning or afternoon shade. Ideally, it should receive some sun for during the day without overheating the contents. Too much solar energy will dry your compost.
If you have a climate with cold winters, you may want to look into insulated compost tumblers that will allow you to compost through the winter months. This type of tumbler is usually made from metal but with an inner insulating material to retain the heat in cooler climates.
Why is my compost tumbler not working?
It all comes down to balancing the components of composting. Proper aeration, correct moisture levels, and enough nitrogen in the beginning to get things cooking!
If your compost seems to be slow, read my guide about “how to heat up a compost tumbler”.
What Is A Good Size Compost Tumbler?
Small composters will fill up quite quickly for most households, but if you don’t have a lot of kitchen waste, this may suit your needs.
My recommendation for a good average size compost tumbler for a small household would be a 30-gallon or 4.8 cubic feet unit per chamber.
Most households with 4 or more people would benefit from a larger unit of about 10 cubic feet or 35-gallons per chamber.


Thank you so much for your guides on using compost tumblers. I’ve recently bought one after realising how much waste I.. well, waste! I’m new to this and your guides are great: simply explained, comprehensive, and understandable. Can’t wait to get composting.
Glad you’ve made the move to making your own compost Sarah – your garden will thank you 🙂
Thank you so much for this post! It’s answered all my questions in one place 🙂 such a handy resource
Happy to help Portia!
I started my first compost bin in May. It was full by mid July, I was careful to balance green vs brown and tumble with each addition. I also chopped kitchen waste in the food processor. It heated up and seemed to be doing well. My second bin is now full but I am not sure if my first bin is ready to use. The material in the first bin (cooking since mid July) is dark brown, smells pleasant and sweet, is moist but I can’t squeeze any water out, but it is lumpy not crumbly. A few bits of egg shell are recognizable but not anything else. It has reduced in volume by over half. What do you think?
Thanks,
Frances Richardson
Hi Frances!
It sounds like you’ve been doing a great job managing your compost bins! Finished compost can be lumpy, and it doesn’t have to be completely crumbly. The lumps are probably harder materials that naturally take longer to decompose. You can remove these using a compost sifter and put the lumpy bits back in the compost bin 🙂
It’s likely that your first bin is close to being finished compost. You can go ahead and use it in your garden, but If you have any concerns about its maturity, you can also let it sit for a little longer to further break down.
Happy composting !