How To Make Compost In A Bucket (Step by Step!)

Every gardener loves compost!
But the compost you buy at a garden center can be disappointing, and I hate throwing away peelings and food scraps!
That’s why I think composting in a bucket is a win-win.
I love the simplicity of this method. I think it’s accessible to everyone, no matter the size of your garden!
And let me tell you, it’s really easy.
With a few simple tools and a 5-gallon bucket from your nearest hardware store, you’ll be composing in no time!
What You Need To Make Compost In A Bucket
There’s no need for specialized equipment or a one-of-a-kind system imported from Scandinavia to make compost in a bucket. The tools and equipment are so basic that almost everyone can make their own.
All I used to make my first compost bucket were:
- A sealable 5-gallon plastic bucket (I bought mine at Home Depot)
- A drill with a sharp 1/4-inch drill bit
- Dry sticks, green plant matter (I often use grass cuttings), and kitchen scraps (like potato peelings, carrot tops, etc.)
That’s it!
The equivalent standard bucket size in Europe and the UK would be 20-litre. If you’re safety conscious or your kids will help you make the compost bucket, a pair of safety goggles and gloves are also a great idea!
Can You Really Make Compost In A Bucket?
Yes, you can make compost in a small container like a bucket! All you need to make compost is an aerated space with organic matter and nitrogen that can retain moisture and heat up.
A bucket ticks all these boxes!
A friend of mine with a small garden once asked me what the smallest size a compost heap could be? At first, she didn’t believe me when I said she could start as small as a 5-gallon bucket. She now has two in the bottom of her garden and couldn’t be happier!
You may ask why you need to aerate the bucket, and the answer is that aerobic decomposition (breaking down organic matter with oxygen) doesn’t release biogases and is usually quicker than alternatives.
The option is anaerobic decomposition (breaking down organic matter without oxygen), which releases methane and carbon dioxide and takes longer than other plant matter decomposition. It can also get pretty smelly if it gets out of control…
So, an aerated compost bucket is an ideal environment for bacteria, worms, and fungi to do their aerobic decomposition! I also find it more fun to be involved with mixing the compost rather than just chucking it in a bucket and forgetting about it.
How To Make Compost In A Bucket (Step-by-Step)
To make compost in a bucket, drill aeration holes all over a 5-gallon sealable plastic bucket. Place a mixture equivalent to 2/3 carbon-rich ingredients to 1/3 nitrogen-rich ingredients by volume in the bucket with a little water. Roll the bucket to aerate once a week. The compost will be ready in 6-8 weeks.
But first, to make the compost, you need a composting bucket! If you don’t already have one, it is really simple to make:
Step 1 – Get A 5-Gallon Bucket
If you have an old 5-gallon bucket at home already, go ahead and use that. If not, your local hardware store should have one, usually for about $5/6.
Also, you’ll need a lid!
Make sure the lid of the bucket seals tightly! One of the first compost buckets I had didn’t seal well, and the first time I rolled the bucket to aerate it, the lid popped off, and it spilled brown banana peels and egg shells all over my lawn. Take it from me: the tighter the cover, the better!
Step 2 – Remove The Handle
Aeration is the name of the compost bucket game. To ensure enough aeration through the mixture, you’ll need to roll the bucket about once a week and let air flow through it naturally the rest of the time.
A bucket with a handle will be difficult to roll, so I recommend you remove the handle if yours has one. If you need the handle to carry it, you can go ahead and leave it on, but keep in mind that rolling will be more difficult. To keep things interesting, I roll the bucket from one end of my yard and back again once a week, which would be impossible with the handle still attached!
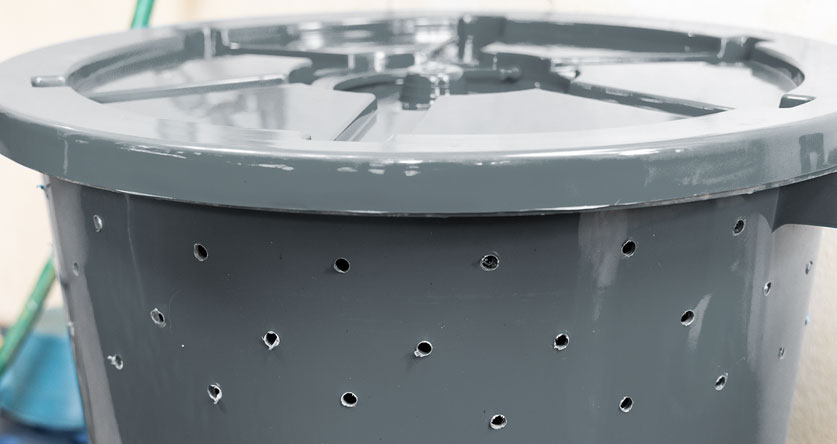
Step 3 – Drill Some Holes
With the handle gone, you can focus on drilling breathing holes in the rest of the bucket.
To do this, go ahead and drill plenty of holes in the bucket’s lid, sides, and base. As a rule of thumb, I drill about 20-25 holes each in the top and bottom and about 40 evenly spaced holes in the sides of the bucket.
A quick note on the size of the holes: I suggested using a 1/4-inch drill bit, but a 1/2-inch bit will work fine, too. Wood drills (the kind with a spur-point) are well suited for drilling plastic.
How To Start A Compost Bucket
Once the bucket is ready, you can start filling it with the compost ingredients.
A compost bucket takes these four basic elements and turns them into compost:
- Carbon-rich items
- Nitrogen-rich items
- Moisture
- Oxygen
Carbon-rich items are your ‘brown’ ingredients, like dry sticks, dead leaves, small branches, paper, and cardboard packaging. These are the bulk of what the decomposers will break down and turn into the compost.
Nitrogen-rich items are your ‘green’ ingredients, like fresh-cut grass, green leaf cuttings, food scraps, and coffee grounds. These contain moisture, nitrogen, and nutrients and will help the bacteria and fungi to grow, breaking down the carbon-rich ingredients.
A good balance and mix of the first three items will get your compost started in no time. Too many nitrogen-rich ingredients in the blend will use up the oxygen too quickly, making the compost slimy. At the same time, too many carbon-rich ingredients will dry out the compost.
The best mix is about 25 parts of carbon-rich ingredients to 1 part nitrogen-rich ingredients (C/N ratio of 1:25). Because this is quite difficult to visualize, the comparable way to measure carbon and nitrogen is a mix of 3 parts “brown” ingredients with 1 part “green.”
Mix all these together in the correct ratio, and you’ve started your compost bucket!
Air is also an essential component in aerobic composting. The air holes will help, but regular turning allows oxygen into the mixture.
The last ingredient is time. Both the time for the compost to break down and the time you take to roll your bucket and check the moisture levels.
Be careful not to open your bucket too often. This will let heat out, which is necessary for composting to take place!
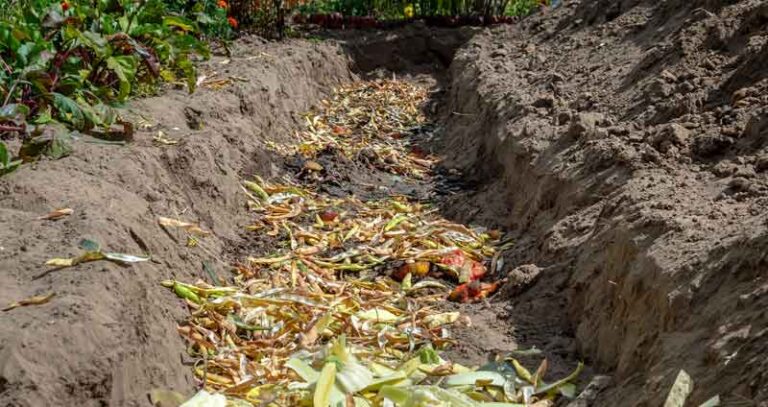
Place the bucket in the corner of the garden, preferably with soil underneath. With holes in the bottom, compost buckets will release leachate (a brown liquid that seeps off the compost). I have found if you leave your compost bucket on a paved area, it leaks out and makes a mess, but if you leave it on soil, it will naturally seep away. It may even attract a few worms that will help aerate the bucket even more 🙂
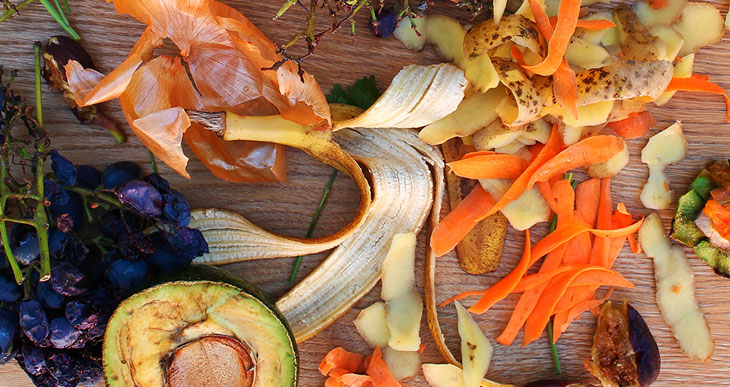
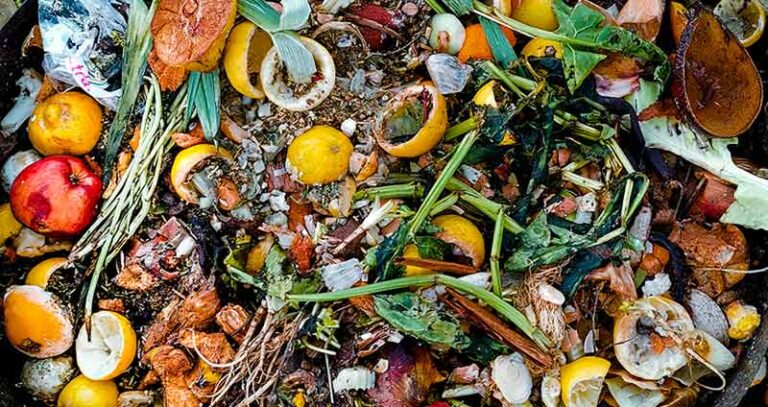
What Can You Put In Your Compost Bucket?
You can put almost any organic matter in the bucket if they’re in the proper ratios.
I put these things from my kitchen and garden in the compost bucket:
- Dry twigs and sticks
- Dry leaves
- Fresh grass and leaf cuttings
- Vegetable peelings and cuttings (I do try to avoid onion and garlic cuttings as they can start to smell)
- Eggshells
- Coffee grinds and tea bags
- Paper and cardboard
I have used all these ingredients at one time or another in a compost bucket, and I’ve learned a few things about some of these ingredients:
- Heavily processed items like newspapers, tea bags, and cardboard sometimes have processing chemicals in them, which bacteria don’t always like. Adding too much can cause the decomposition to slow down, so be careful how much you put into your bucket.
- Cooked food can be put in a composting bucket, but sometimes, it begins to rot and lets off a bad smell. The food is often wet and can add too much moisture to the mix, so be careful!
- I wouldn’t recommend putting raw meat or bones in the compost bucket. Raw meat goes bad quickly and can attract rodents, flies, and maggots! Avoid meat and fish since this tends to putrify. Bones decompose much longer than anything else in the bucket, so they aren’t great for composting.
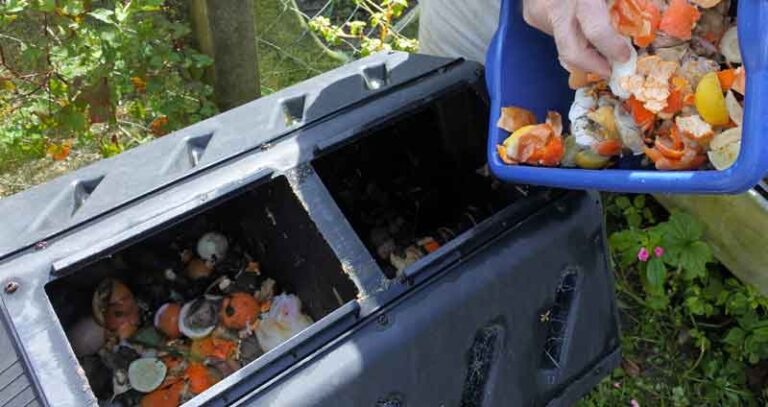
What To Do When Your Compost Bucket Is Full?
When your compost bucket is full, the only thing to do is wait. I usually let the composting do its thing for 6-8 weeks.
During that time, I roll the bucket to mix the ingredients and aerate the compost at least once a week. I occasionally crack the lid open a little to check the moisture and see if everything looks good inside.
The contents of the bucket will usually halve in size over the weeks. Don’t add new ingredients into the bucket, as this will delay when you can use the finished compost.
The one thing better than a compost bucket is two buckets! If you have fresh ingredients you want to compost, why not start a second and third bucket and keep them in rotation?