How To Use A Compost Bin (Beginner’s Step-By-Step Guide)

Wait!
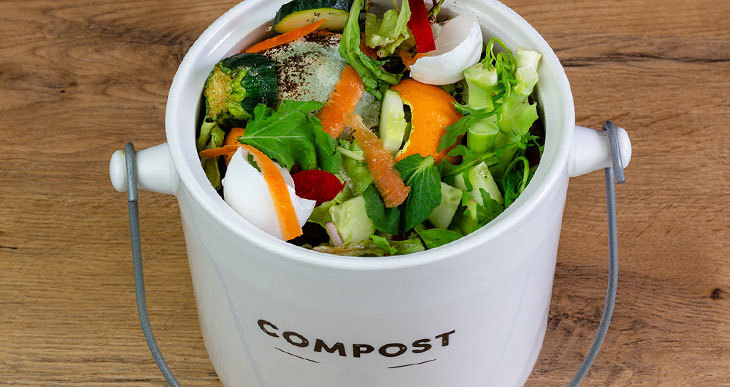
Don’t chuck that banana peel in the trash; turn it into healthy food for your plants!
Almost a third of the things we throw away are compostable, so setting up a compost bin is an excellent way to live greener.
To get you started, here’s a beginner’s step-by-step guide to using a compost bin.
How To Use A Compost Bin Properly
To use a compost bin effectively, maintain a balance of organic wastes, water, and air. You can achieve this by following these steps: build a pile of alternate layers of carbon sources (like dried leaves) and nitrogen-rich matter (like fruit peels), keep the pile damp, and turn the pile regularly.
Starting a compost bin powerful enough to break down your kitchen and garden wastes isn’t as simple as tossing leaves and fruit peels in a bin and hoping for the best. First, you need to know what things go into compost bins and how to layer, water, and aerate them for best results.
Coming up, your easy guide to composting basics…
A compost bin is a multitasking eco-warrior. Not only does it decompose organic wastes around your home, but it also creates a wonderfully rich soil supplement to help your plants grow.
A beginner-friendly way to start composting is with a basic compost bin (see this one on Amazon). You might already have something you can use as a bin, like a garbage can or plastic storage container, or you could make your own (out of wine crates or wood pallets, for example). A good size for a compost bin is 3 x 3 x 3 feet.
Note: The size of the bin is important. Anything too small and the compost has difficulty maintaining heat and moisture. Three-foot square is the minimum, and bigger is definitely better!
So you’ve got your bin; now put it to work!
Essentially, this involves purposely layering different organic wastes, keeping everything moist, and turning the pile frequently.
How Does A Compost Bin Work?
A compost bin works by creating the ideal environment for decomposition. Organic waste materials slowly turn to compost if they include a balance of green and brown materials, water, and oxygen. Compost bins are designed to provide these conditions while containing everything in a clean and compact design.
But how does organic waste become nutrient-dense food for your plants?
Microorganisms do the dirty work!
A compost bin is like an all-you-can-eat buffet for tiny organisms like bacteria and fungi. They break down the organic materials, absorb what they can, and release good-for-plants nutrients like nitrogen, phosphorus, and magnesium.
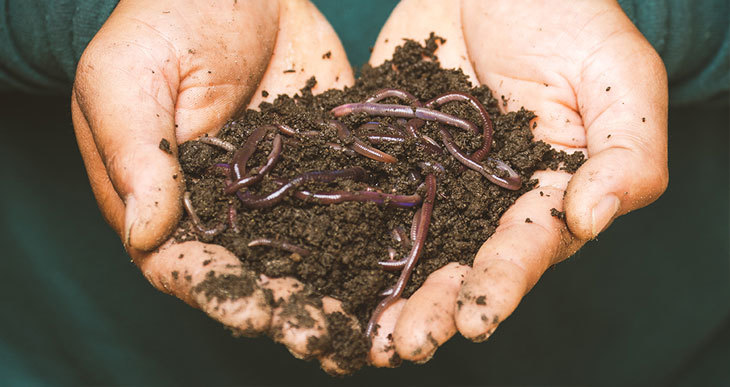
Wriggly insects like centipedes and worms often join the feast, helping to transform our organic household wastes into nutrient-packed goodness for our gardens.
What’s The Best Way To Use A Compost Bin?

All organic materials break down eventually. You can, however, create spot-on conditions for a speedier waste-to-compost transformation.
With the right balance of organic matter, water, and air in your compost bin, you’ll help microorganisms produce enough heat to decompose your wastes efficiently.
6 Steps To Using A Compost Bin Properly
For the best composting results, follow these steps.
Step 1: Select Organic Materials For Your Compost Bin
A well-functioning compost bin needs carbon-rich materials (also known as browns) and nitrogen-rich materials (called greens). Microorganisms use carbon and nitrogen to fuel and strengthen themselves so they can create your compost.
Here are examples of greens and browns that contribute to a thriving compost pile:
Note: If viewing on phone, please swipe the table to scroll horizontally.
Greens (Usually Wet) | Browns (Usually Dry) |
Fruit and vegetable scraps | Shredded scrap paper and non-glossy newspaper |
Yard waste like fresh grass clippings, fresh weeds without seeds, and green grass | Yard waste like dried leaves, dried grass clippings, dried weeds without seeds, small branches, and twigs |
Teabags, coffee grounds | Straw and sawdust |
Manure | Egg cartons |
You can also add eggshells and plain rice, pasta, and bread to your compost bin. However, these materials might attract pests to your pile.
Some organic materials can sabotage your composting efforts. Don’t add these to your compost bin:
- Meat and bones
- Dairy products
- Fats and oils
- Pet droppings
- Diseased or poisonous plants
- Yard waste treated with chemical pesticides
- Stickers stuck on fruit and veg peels
- Charcoal or coal ash
Step 2: Stockpile Organic Materials For Your Compost Bin
Before you can start building your compost pile, you should accumulate enough browns and greens to create a pile that’s at least 3 feet high. This size will maximize the decomposing potential. You can store your greens in closed tubs and your browns in buckets until you have enough.
Try to collect about twice as many browns than greens.
The logic is to create a balanced green to brown ratio (also known as the carbon/nitrogen C: N ratio). Unfortunately, there is a lot of debate about what makes the perfect C: N ratio. This can get very confusing. So the best way I’ve found is to work with a simple formula of 1 bucket of green stuff to 2 buckets of brown matter!
Step 3: Layer Organic Materials Into Your Compost Bin
Once you’ve got a good collection of greens and browns, you can add them to your compost bin in strategic layers.
Start with a layer of browns, about 2 inches high. Lightly water the layer. Next, add a layer of greens, also about 2 inches tall. Lightly water this layer. Keep alternating layers of browns and greens, ending with a browns layer to keep smells in and flies out.
(If you add a large amount of fruit and vegetable scraps, it can be helpful to finish off by adding a layer of soil to your compost bin. This helps reduce smells and prevents flies in your compost)
Your pile must have more browns than greens. Browns help air and water flow through the stack to keep the microorganism workers healthy and happy.
A sign that you need more browns: a smelly compost pile. If your pile isn’t heating up, you probably need more greens.
Tip: shred your material before adding it to the compost bin. This is especially useful for harder brown materials like twigs and sticks. Not only will this make the “turning” or mixing process easier (see step 5), but it will also increase the surface area of the organic matter, making it easier for microorganisms to do their work. A leaf shredder like this one on Amazon does a great job.
Step 4: Get Your Compost Bin’s Moisture Level Right
Time to dig in! Grab a handful from your compost pile and squeeze. If the moisture content is like that of a wrung-out sponge (damp but not soggy), it’s just right.
If the pile is too dry, add more water and if it’s too wet, add more browns.
Step 5: Keep Air Flowing Through Your Compost Pile
To keep your pile aerated and decomposing efficiently, you need to turn it regularly. Stick a garden fork or spade into the pile and turn it regularly at first (every one or two days), then every week or so.
Related: See this guide for more about turning your compost.
Step 6: Look For Signs That Your Compost Is Ready To Use
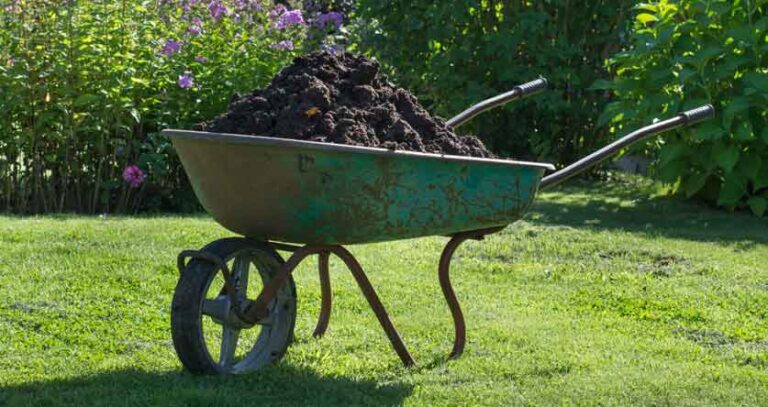
Take good care of your compost pile, and you can have a fresh batch of compost in three to six months.
You’ll know it’s ready if its color is dark and rich, its texture is crumbly and smooth, and its smell is earthy and woody.
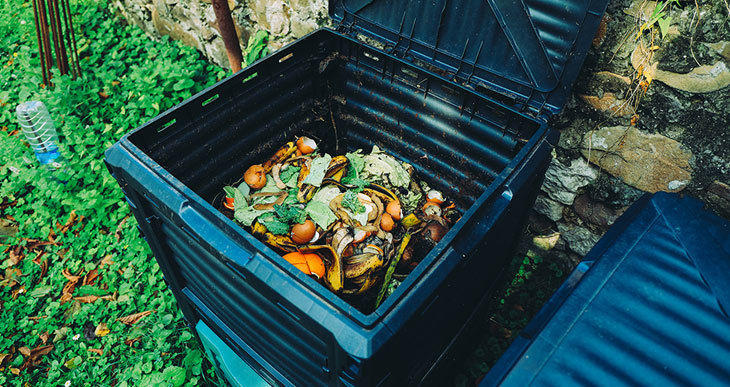
Should A Compost Bin Be Open Or Closed?
You can choose whether to have an open or lidded compost bin.
The main benefit of an open bin is easy to access for dumping and turning. The downsides are that small animals can sneak in, and the bin contents can spill out.
A closed bin can speed up the composting process because it helps retain heat and moisture. Plus, lids help keep rodents out. Closed bins are a better pick if you live in a rainy or cold area. Remember to get one with a large capacity like this (Amazon)
If your compost seems to be taking a long time, something is probably out of balance. The moisture may be evaporating too quickly. A lid will definitely help retain humidity.
Where Do You Put A Compost Bin?
The best home for a compost bin is on flat, well-draining ground.
Look for somewhere that’s partially shaded (if it’s too sunny, your compost pile will dry out, and if it’s too shady, it might get drenched).
Your compost bin should also be easy to get to and away from your entertaining areas (well-kept bins won’t stink, but your guests probably won’t consider them attractive garden features).
Related: Ideal compost bin location
How Do You Start A Compost Bin?
An insider tip is to start your compost bin by putting down a layer of branches, sticks, and corn cobs a few inches high. This nifty trick keeps air flowing below the composting matter.
This can also act as a drainage system and helps prevent the compost from remaining soaked after watering or a rainstorm.
After this first layer, add your layers of browns and greens (see step 3).
What Do You Put At The Bottom Of A Compost Bin?
The best base for a compost bin is no base. Containers without bases give entry to microorganisms and creepy crawlies from the ground below. They also allow excess water to drain into the soil. Some gardeners line the bottom of an open bin with chicken wire to keep rodents out.
If your compost bin has a solid bottom, you can make small drainage holes in the base. And if you’ll be putting your bin on a hard surface like concrete, raise it (on a pallet, for example) to encourage drainage.
How Do You Activate A Compost Bin?
An active compost bin is simply one with microorganisms producing enough heat to properly break down the organic matter – that’s about 90 to 140 degrees F.
Carefully following the steps in the earlier section should activate your compost bin.
However, if your bin is underperforming, there are things you can do to help heat it up.
First, make sure your compost pile is moist.
Next, check that your pile is big enough to build the heat it needs to do its job well (at least 3 feet high).
If your pile is large enough and moist, it might need more nitrogen. Manure, bone meal, soybean meal, or alfalfa meal can boost its levels of this nutrient.
Something else that might be missing from your pile: microorganisms. You can fix this by adding a generous scoop of topsoil (and worms if you can find them) to the mix.
Conclusion
Once you get the basics right (building a pile of browns and greens and keeping it moist and aerated) and your composting confidence has grown, you can experiment to find your own tricks for speeding up the decomposition process!